|
项目描述:在微信小程序中通过与Springboot操作数据库实现简单的增删改查,其中我是用springboot整合mybatis-plus 和mysql使用的 1. 开发前准备1.1 前置知识
1.2 环境参数
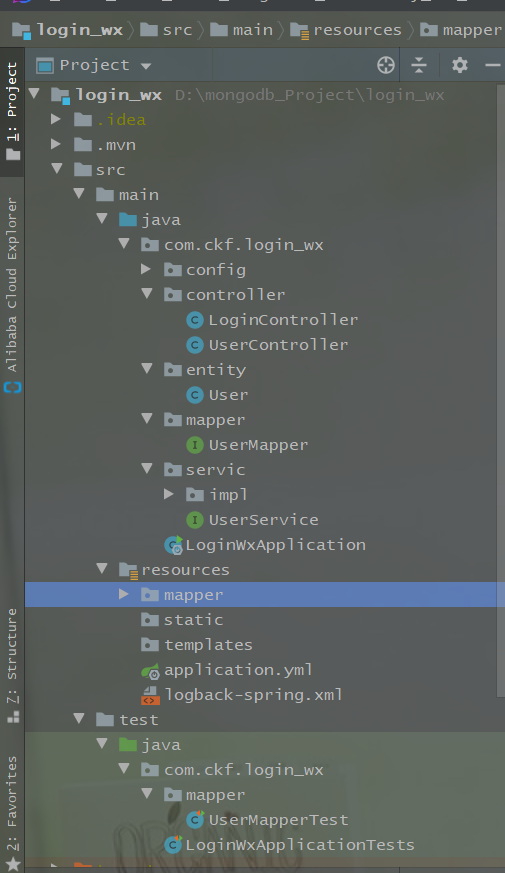
2.开发者服务器项目结构: 2.1 初始配置(1)pom.xml配置
 <dependencies>
        <dependency>
            <groupId>org.springframework.boot</groupId>
            <artifactId>spring-boot-starter-web</artifactId>
        </dependency>

        <dependency>
            <groupId>org.mybatis.spring.boot</groupId>
            <artifactId>mybatis-spring-boot-starter</artifactId>
            <version>2.1.1</version>
        </dependency>

        <!--模板引擎-->
        <dependency>
            <groupId>org.springframework.boot</groupId>
            <artifactId>spring-boot-starter-thymeleaf</artifactId>
        </dependency>

        <!-- 引入阿里数据库连接池 -->
        <dependency>
            <groupId>com.alibaba</groupId>
            <artifactId>druid</artifactId>
            <version>1.1.14</version>
        </dependency>

        <!-- mysql依赖-->
        <dependency>
            <groupId>mysql</groupId>
            <artifactId>mysql-connector-java</artifactId>
            <version>5.1.42</version>
            <scope>runtime</scope>
        </dependency>

        <!-- mybatisPlus 核心库 -->
        <dependency>
            <groupId>com.baomidou</groupId>
            <artifactId>mybatis-plus-boot-starter</artifactId>
            <version>3.1.0</version>
        </dependency>

        <!--生成实体成get set-->
        <dependency>
            <groupId>org.projectlombok</groupId>
            <artifactId>lombok</artifactId>
            <optional>true</optional>
        </dependency>

        <!-- pagehelper 分页插件 -->
        <dependency>
            <groupId>com.github.pagehelper</groupId>
            <artifactId>pagehelper-spring-boot-starter</artifactId>
            <version>1.2.5</version>
        </dependency>

        <!--junit 测试-->
        <dependency>
            <groupId>junit</groupId>
            <artifactId>junit</artifactId>
            <scope>test</scope>
        </dependency>

        <dependency>
            <groupId>org.springframework.boot</groupId>
            <artifactId>spring-boot-starter-test</artifactId>
            <scope>test</scope>
            <exclusions>
                <exclusion>
                    <groupId>org.junit.vintage</groupId>
                    <artifactId>junit-vintage-engine</artifactId>
                </exclusion>
            </exclusions>
        </dependency>
    </dependencies>

    <build>
        <plugins>
            <plugin>
                <groupId>org.springframework.boot</groupId>
                <artifactId>spring-boot-maven-plugin</artifactId>
            </plugin>
        </plugins>
    </build>

</project>
(2)application.yml
# Spring Boot 的数据源配置
spring:
  datasource:
    name: wx
    url: jdbc:mysql://localhost:3306/wx_mini_program?useUnicode=true&characterEncoding=utf8&zeroDateTimeBehavior=convertToNull&useSSL=true&serverTimezone=GMT%2B8
 username: root
    password: root
    # 使用druid数据源
    type: com.alibaba.druid.pool.DruidDataSource
    driver-class-name: com.mysql.jdbc.Driver
    filters: stat
    maxActive: 20 initialSize: 1 maxWait: 60000 minIdle: 1 timeBetweenEvictionRunsMillis: 60000 minEvictableIdleTimeMillis: 300000 validationQuery: select 'x' testWhileIdle: true testOnBorrow: false testOnReturn: false poolPreparedStatements: true maxPoolPreparedStatementPerConnectionSize: 20 maxOpenPreparedStatements: 20 # mybatis-plus相关配置
mybatis-plus:
  # xml扫描,多个目录用逗号或者分号分隔(告诉 Mapper 所对应的 XML 文件位置)
  mapper-locations: classpath:mapper/*.xml
  # 以下配置均有默认值,可以不设置
  global-config:
    db-config:
      #主键类型 AUTO:"数据库ID自增" INPUT:"用户输入ID",ID_WORKER:"全局唯一ID (数字类型唯一ID)", UUID:"全局唯一ID UUID";
      id-type: auto
      #字段策略 IGNORED:"忽略判断"  NOT_NULL:"非 NULL 判断")  NOT_EMPTY:"非空判断"
      field-strategy: NOT_EMPTY
      #数据库类型
      db-type: MYSQL

  # 指定实体类的包
  type-aliases-package: com.ckf.login_wx.entity
  configuration:
    # 是否开启自动驼峰命名规则映射:从数据库列名到Java属性驼峰命名的类似映射
    map-underscore-to-camel-case: true
    # 如果查询结果中包含空值的列,则 MyBatis 在映射的时候,不会映射这个字段
    call-setters-on-nulls: true
    # 这个配置会将执行的sql打印出来,在开发或测试的时候可以用
    log-impl: org.apache.ibatis.logging.stdout.StdOutImpl

# PageHelper分页插件
pagehelper:
  helperDialect: mysql
  reasonable: true
  supportMethodsArguments: true
  params: count=countSql
2.2 小程序用户表
CREATE table users(
 id int not null PRIMARY key auto_increment,
 name varchar(255) not null,
 age int not null );

insert into users value(null,'陈克锋',18);
insert into users value(null,'陈克帅',11);
insert into users value(null,'陈克兵',14); select * from users;
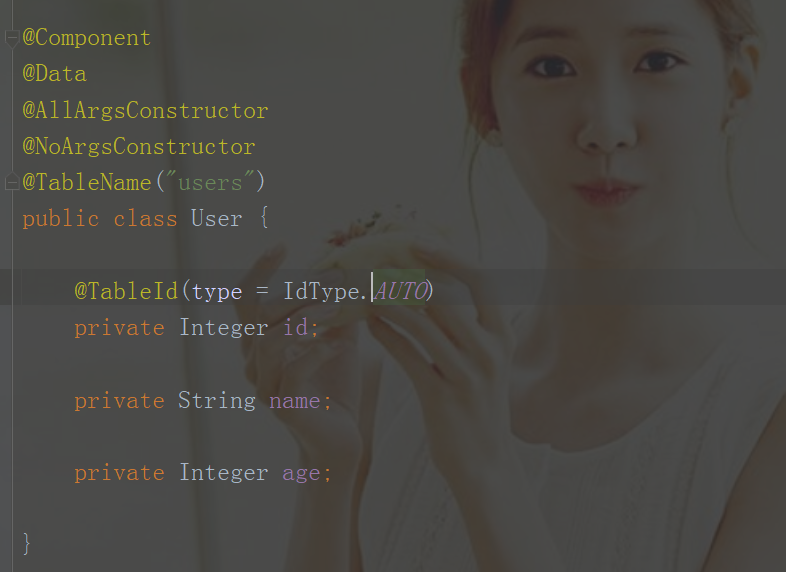
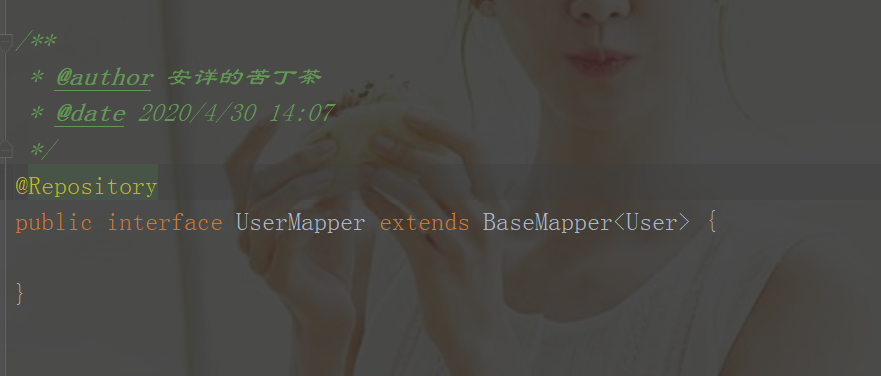
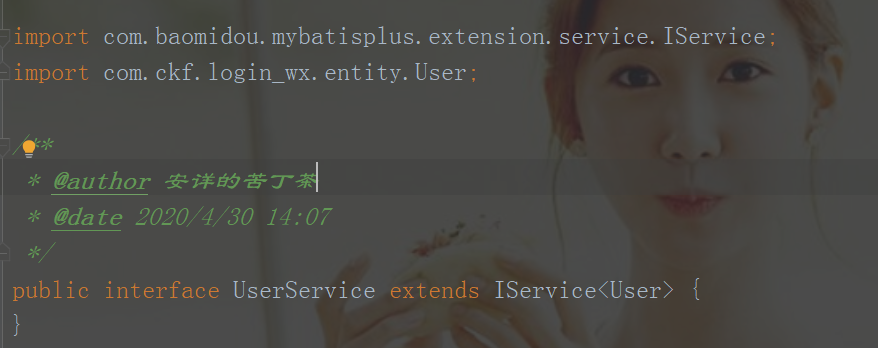
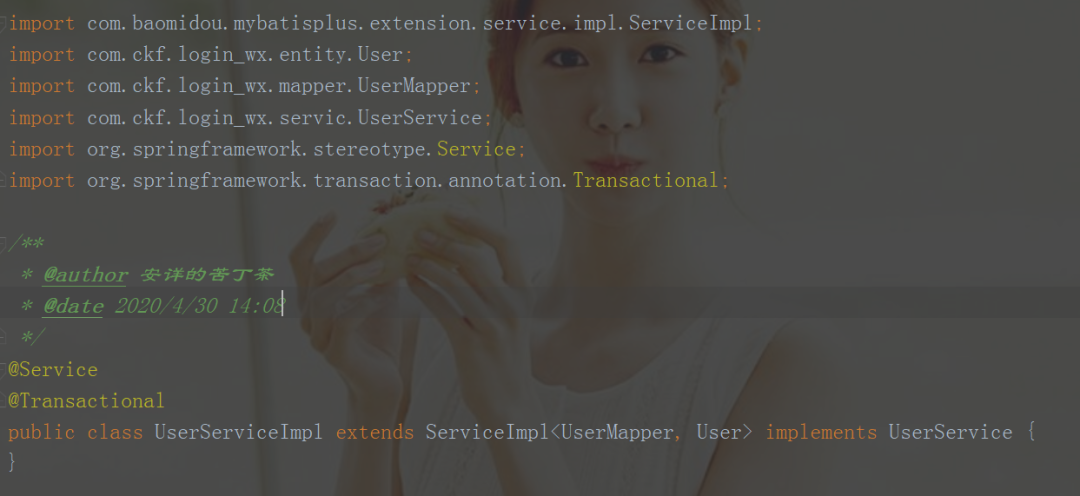
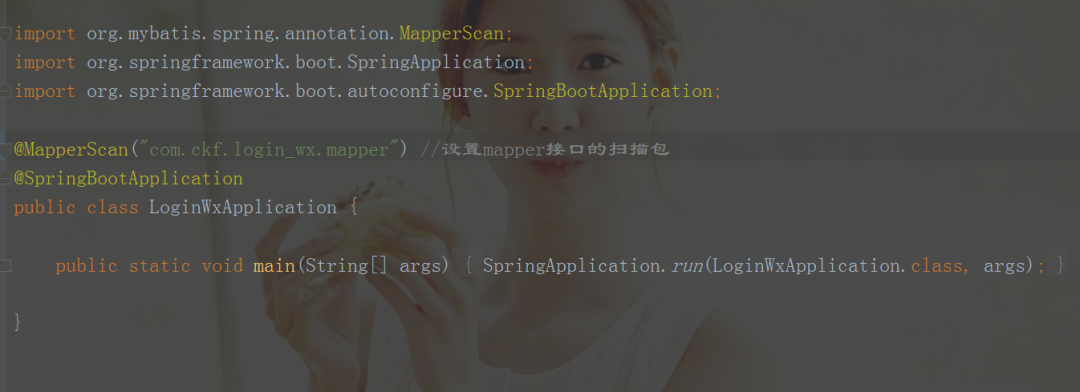
2.3 pojo2.4 mapper2.5 service2.5 serviceImpl配置SpringBoot扫描mapper 2.6 controllerLoginController
package com.ckf.login_wx.controller;

import org.springframework.web.bind.annotation.PostMapping;
import org.springframework.web.bind.annotation.RestController;

import java.util.HashMap;
import java.util.Map; /**
 * @author 安详的苦丁茶
 * @date 2020/4/30 11:46 */ @RestController public class LoginController { /**
     * 登录
     * @param phone
     * @param password
     * @return */ @PostMapping("/doLogin") public Map doLogin(String phone, String password){
        Map map = new HashMap(); if ((phone.equals("10086")&& password.equals("123456"))){
            map.put("code",200);
            map.put("result","登录成功");
            System.out.println("登录成功");
        }else {
            map.put("result","no");
        } return map;
    }

}
UserController
package com.ckf.login_wx.controller;

import com.ckf.login_wx.entity.User;
import com.ckf.login_wx.servic.UserService;
import org.springframework.beans.factory.annotation.Autowired;
import org.springframework.web.bind.annotation.*; /**
 * @author 安详的苦丁茶
 * @date 2020/4/30 13:39 */ @RestController
@RequestMapping("/test") public class UserController {

    @Autowired private UserService userService; /**
     * 查询全部
     * @return */ @GetMapping("/list") public Object list(){
        System.out.println("查询成功"); return userService.list();
    } /**
     * 根据id删除
     * @param id
     * @return */ @GetMapping("/delete") public boolean delete(Integer id){
        System.out.println("删除成功"); return userService.removeById(id);
    } /**
     *  根据id查询
      * @param id
     * @return */ @GetMapping("/byid") public Object byid(Integer id){
        System.out.println("查询成功"); return userService.getById(id);
    } /**
     *  修改
     * @param user
     * @return */ @PostMapping("/update") public boolean update(@RequestBody User user){
        System.out.println("修改成功"); return userService.updateById(user);
    } /**
     * 添加
     * @param user
     * @return */ @PostMapping("/add") public boolean add(@RequestBody User user){
        System.out.println("添加成功"); return userService.save(user);
    }

}
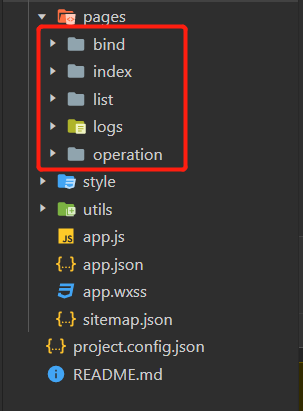
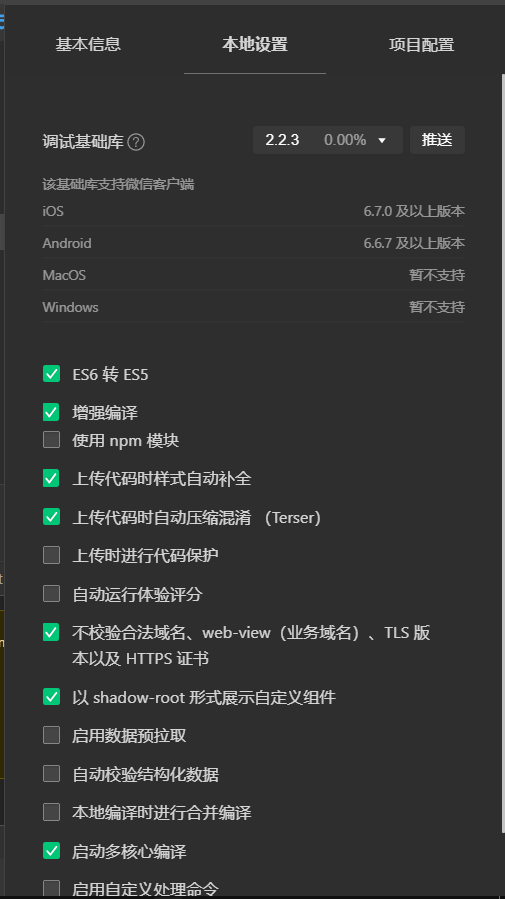
3. 微信小程序项目结构: 3.1 初始配置3.2 bing.wxml
<!--pages/bind/bind.wxml-->
<view>

  <form bindsubmit='doLogin'>
            <!--账号-->
            <view class="inputView">

                <label class="loginLabel">账号</label>
                <input name="phone" value='10086' class="inputText" placeholder="请输入账号" />
            </view>
            <view class="line"></view>

            <!--密码-->
            <view class="inputView">

                <label class="loginLabel">密码</label>
                <input name="password" value='123456' class="inputText" password="true" placeholder="请输入密码" />
            </view>
            <view class="line"></view>
            <!--按钮-->
            <view class='backColor'>
                <button class="loginBtn" formType="submit"  open-type='getUserInfo' >登录</button>
            </view>

            <!-- <view>
                <button class="goRegistBtn" type="warn" open-type='getUserInfo' bindgetuserinfo='doLogin'>微信登录</button>
            </view> -->
        </form>

</view>
3.3 bing.js3.3 list.wxml
<!--pages/list/list.wxml-->
  <button class="add" type='primary' bindtap='addArea'>添加</button>
<view class="container">
  <view class='widget'>
    <text class='column'>编号</text>
    <text class='column'>姓名</text>
    <text class='column'>年龄</text>
    <text class='link-column'>操作</text>
  </view>
  <scroll-view scroll-y="true">
    <view>
      <block wx:for='{{list}}'>
      <view class='widget'>
        <text class='column'>{{item.id}}</text>
        <text class='column'>{{item.name}}</text>
         <text class='column'>{{item.age}}</text>
        <view class='link-column'>
          <navigator class='link' url='../operation/operation?id={{item.id}}'>编辑</navigator> |
          <text class='link' bindtap='deleteArea' data-areaid='{{item.id}}' data-areaname='{{item.name}}' data-index='{{index}}'>删除</text>
        </view>
        </view>
      </block>
    </view>
  </scroll-view>

</view>
3.4 list.js
// pages/list/list.js
Page({ /**
   * 页面的初始数据 */ data: {
    list:[]
  }, /**
   * 生命周期函数--监听页面加载 */ onLoad: function (options) {

  }, /**
   * 生命周期函数--监听页面初次渲染完成 */ onReady: function () {

  }, /**
   * 生命周期函数--监听页面显示 */ onShow: function () { var that=this;
    wx.request({
      url: 'https://localhost:8080/test/list',
      method:'GET',
      data:{},
      success:function(res){ var list=res.data; if(list==null){ var toastText='获取数据失败';
          wx.showToast({
            title: toastText,
            icon:'',
            duration:2000 //弹出时间
 })
        }else{
          that.setData({
            list:list
          })
        }
      }
    })
  }, /**
   * 生命周期函数--监听页面隐藏 */ onHide: function () {

  }, /**
   * 生命周期函数--监听页面卸载 */ onUnload: function () {

  }, /**
   * 页面相关事件处理函数--监听用户下拉动作 */ onPullDownRefresh: function () {

  }, /**
   * 页面上拉触底事件的处理函数 */ onReachBottom: function () {

  }, /**
   * 用户点击右上角分享 */ onShareAppMessage: function () {

  },
  addArea:function(){
    wx.navigateTo({
      url:'../operation/operation' })
  },
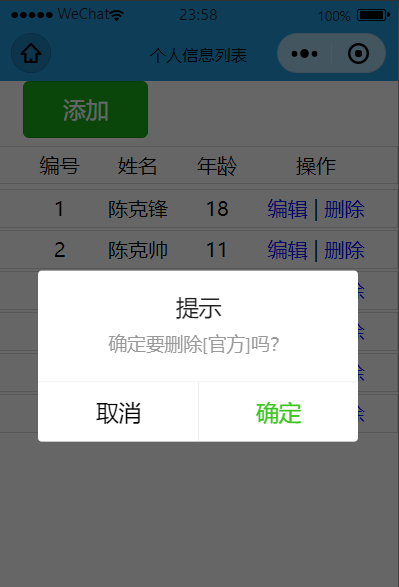
  deleteArea: function (e) { var that=this;
    wx.showModal({
      title: '提示',
      content: '确定要删除[' + e.target.dataset.areaname +']吗?',
      success:function(sm){ if(sm.confirm){
          wx.request({
            url: 'https://localhost:8080/test/delete',
            data: { id: e.target.dataset.areaid},
            method:'GET',
            success:function(res){ var result=res.statusCode; var toastText="删除成功"; if(result!=200){
                toastText = "删除失败";
              }else{
                that.data.list.splice(e.target.dataset.index,1);
                that.setData({
                  list:that.data.list
                });
              }
              wx.showToast({
                title: toastText,
                icon:'',
                duration:2000 });
            }
          })
        }
      }
    })

  }
})
3.5 app.json
{ "pages": [ "pages/bind/bind", "pages/list/list", "pages/logs/logs", "pages/operation/operation", "pages/index/index" ], "window": { "backgroundColor": "#F6F6F6", "backgroundTextStyle": "light", "navigationBarBackgroundColor": "#29d", "navigationBarTitleText": "login", "navigationBarTextStyle": "black" }, "sitemapLocation": "sitemap.json", "style": "v2" }
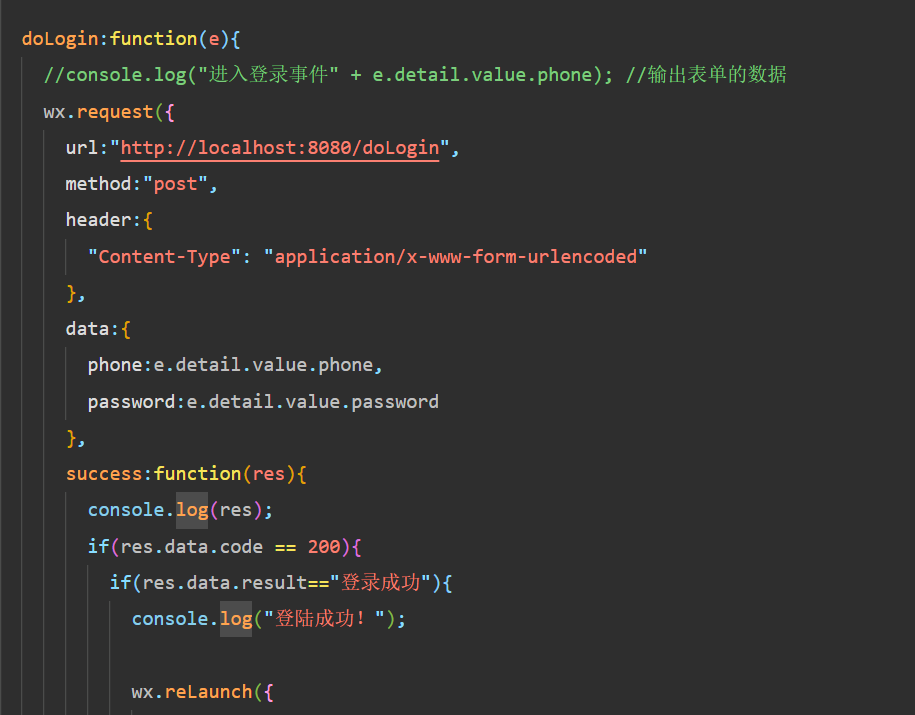
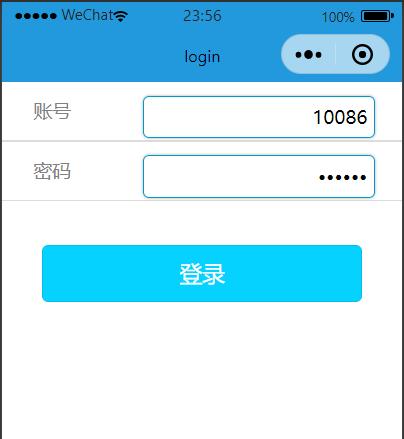
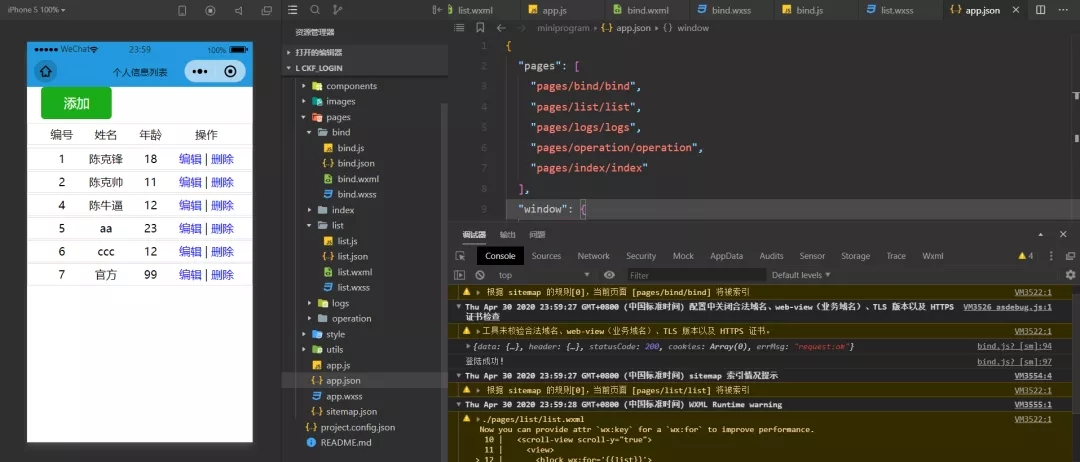
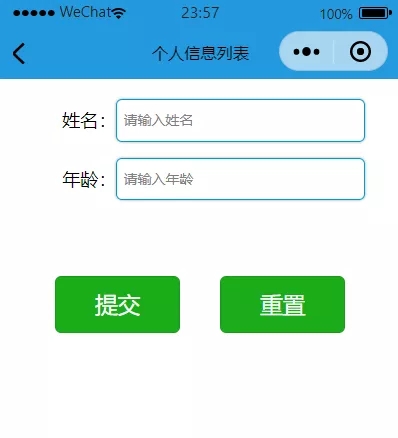
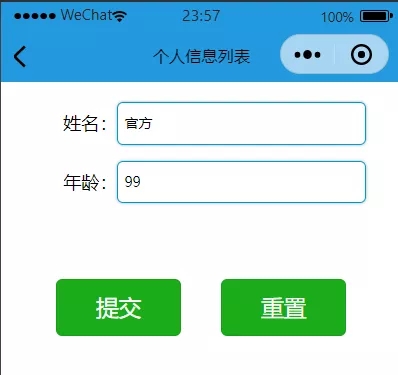
4. 测试启动开发者服务器,启动SpringBoot的main方法。 打开微信小程序开发者工具 登录页面 首页 添加页面 修改页面 删除 到处基本的增删改查操作已经完成了 如有需要前往 Gitee(码云)下载 前台:https://gitee.com/ckfeng/applet_of_wechat.git 后台:https://gitee.com/ckfeng/wx_login.git |
Spring Boot 整合微信小程序实现登录与增删改查
发布:2020-05-13 10:04浏览: 次来源:网络 作者:huan
免责声明:本站所有文章和图片均来自用户分享和网络收集,文章和图片版权归原作者及原出处所有,仅供学习与参考,请勿用于商业用途,如果损害了您的权利,请联系网站客服处理。
相关文章
- 微信小程序app.json文件常用配置说明2021-07-09
- 微信小程序文字控制单行超过显示省略号2021-07-09
- 微信小程序参数传递的几种方法2021-07-09
- 微信小程序使用button按钮分享2021-07-09
- 微信小程序的setData2021-07-09
- 小程序分享,获取openid2021-07-08
- 微信小程序-实现tab2021-07-08
- 微信开发者工具新建和导入小程序2021-07-08
- 微信小程序实现点击拍照长按录像功能2021-07-08
- 微信小程序必知知识2021-07-08

